

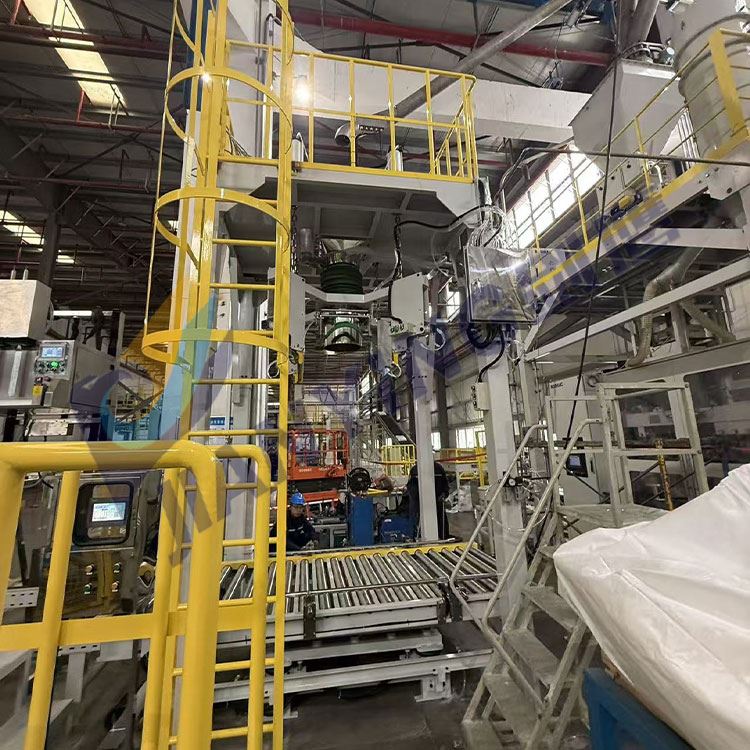
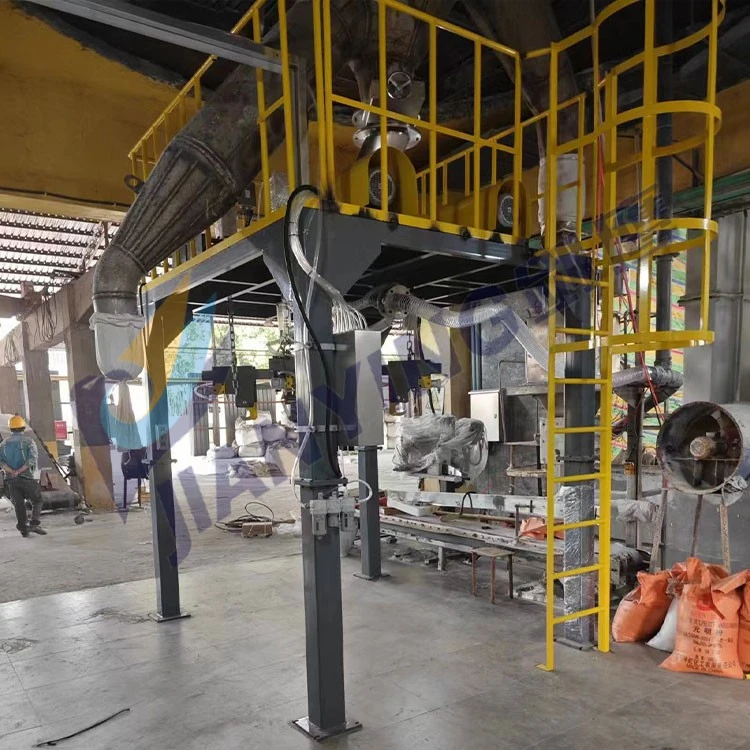
If you're new to operating a facility that handles bulk materials like grains, powders, or aggregates, installing a Big Bag Filling Machine can feel like a daunting task at first. Having spent years supporting thousands of manufacturers, agricultural producers, and chemical processors as a bulk bag equipment supplier, I've seen firsthand how a smooth installation process directly translates to lower downtime, more consistent filling weights, and longer machine lifespans. This guide will walk you through every critical step, from pre-installation planning to post-setup testing, and even highlight how our specialized machines (including the Bulk Bag Filling Machine line) are designed to make this process as straightforward as possible. Whether you're replacing an old unit or outfitting a new production line, following these steps will help you avoid common pitfalls and get your system up and running quickly.
Pre-Installation: Lay the Groundwork Before Unboxing
Before your Big Bag Filling Machine arrives, skipping pre-installation checks is like building a house without a foundation-it's almost guaranteed to cause delays. From my experience, 30% of installation issues stem from inadequate pre-planning, not the machine itself. Let's break down what you need to do here.
First, confirm your site's physical specs. Bulk bag filling machines are heavy-most standard units weigh between 2,000 and 5,000 pounds, so you need a reinforced concrete floor capable of supporting at least 125% of the machine's total operating weight. If your facility has a mezzanine or is on an upper floor, you'll need to consult a structural engineer to verify load-bearing capacity; we've had customers delay installations for weeks because they skipped this step and had to reinforce their floor last minute. Next, measure the available space around the machine: leave at least 3 feet of clearance on all sides for maintenance, operator access, and bag changing. For our Horizontal Single-Helix Feeding Bag Packaging Machine Per Ton, which uses a side-mounted feeding system, you'll want 4 feet of clearance on the feed side to allow easy access to the auger for cleaning or part replacement.
Then, line up utilities exactly as specified in the machine's manual. Almost all bulk bag filling machines require a 3-phase electrical connection (check your model's voltage requirements-most industrial models are 480V), a compressed air line rated at 90–120 PSI for bag clamping and dust extraction, and a drain for any condensate that might accumulate in the machine's hopper. A common mistake here is under-sizing the electrical wiring or air line: if the machine doesn't get enough power, the filling cycle will slow down or cause motor burnouts; if air pressure is too low, bag clamps won't secure properly, leading to spills during filling. We always provide a site preparation checklist with every machine order, and I recommend sending it to your electrician and maintenance team 2 weeks before delivery to avoid last-minute scrambles.
Finally, gather your tools and supplies ahead of time. You'll need a forklift rated for at least 6,000 pounds (to unload and position the machine), a torque wrench (for securing bolts to the floor), a level (both laser and bubble level for accurate alignment), PPE (hard hats, safety glasses, gloves for handling heavy parts), and of course, the empty bulk bags you'll be using (make sure they're compatible with your machine's bag spout size-our Bulk Bagging Machine works with most standard 1-ton to 2-ton bags, but custom bag sizes may require adapter parts).
Step 1: Unboxing and Positioning the Machine (The First 2 Hours)
Once your Ton Bag Packing Machine or other bulk bag equipment arrives, resist the urge to start unbolting parts immediately. Take 15 minutes to inspect the shipping crate for damage-dents, bent metal, or broken seals could indicate internal damage that might not be obvious later. Document any issues with photos and notify the shipping company and your supplier right away; most reputable suppliers (including us) offer shipping insurance to cover replacement parts if damage occurs.
Next, use your forklift to carefully move the machine from the delivery area to its final location. Never lift the machine by its control panel or feeding auger-these are fragile components that can crack or bend if under stress. Most machines come with built-in lifting points stamped on the frame, so always attach the forklift slings to these points. Once the machine is in the rough position, use a laser level to adjust its placement. The machine needs to be perfectly level front-to-back and left-to-right to ensure consistent filling weights; if it's tilted, material will pool on one side of the hopper, leading to underfilled or overfilled bags. Spend extra time here-we've had customers who skipped this and ended up with 5–10% weight variation on every bag, which cost them thousands of dollars in product giveaway.
Once the machine is positioned and level, mark the location of the anchor holes on the floor. You'll need to drill ½-inch to ¾-inch holes (depending on the machine's bolt size) into the concrete, insert concrete anchor bolts, and tighten them to 50 ft-lbs of torque with your torque wrench. Double-check the level after anchoring-sometimes tightening bolts can shift the machine slightly, so adjust as needed before moving to the next step.
Step 2: Connecting Utilities and Pre-Testing the Frame (Next 1–2 Hours)
With the machine secured to the floor, it's time to hook up your utilities. Start with electrical: turn off the main power breaker at your facility before connecting the machine's power cable to the 3-phase line. If you're not experienced with 3-phase wiring, hire a licensed electrician to do this-incorrect wiring can damage the machine's motor or control panel, which are not covered under standard warranties. Once connected, turn the power on and check the control panel for error codes; a "no power" or "phase mismatch" code is a sign you need to adjust the wiring before proceeding.
Next, connect the compressed air line. Most machines use a quick-connect fitting, so just attach the line to the machine's air inlet and turn on the air supply. Check for leaks by spraying soapy water on the connections-bubbles mean a loose seal, which you'll need to tighten or replace. For machines with dust extraction systems (common in powder handling), also connect the dust collection hose to the machine's exhaust port and test the suction to ensure it's pulling away dust from the filling area.
Before moving to any operational tests, do a final check of all connections: make sure the anchor bolts are still tight, electrical wires are secured away from moving parts, and air lines are not kinked. This is also a good time to test the emergency stop button-every bulk bag filling machine has one, usually on the control panel, so press it and confirm that all motors stop immediately when activated. If it doesn't, you'll need to troubleshoot the wiring before proceeding; this is a critical safety feature that can prevent serious injury if something goes wrong during operation.
Step 3: Calibrating the Filling System (Critical for Accuracy)
Calibration is the most important step in the installation process, and it's where many new operators make mistakes that lead to inconsistent filling. I always compare calibrating a big bag filling machine to setting up a scale-if it's off by even a few pounds, you'll waste product and risk compliance issues with local regulations.
Start by setting up a test empty bulk bag. Attach the bag's spout to the machine's filling head, making sure it's clamped securely (if the clamp is loose, the bag can shift during filling, leading to uneven weight). Next, access the machine's control panel menu to set your desired filling weight-for our per-ton horizontal helix machines, you can set both a target weight and a "shut-off threshold" that stops the auger when the bag reaches your target. It's best to start with a lower test weight first (like 500 pounds) instead of a full ton, so you can adjust gradually without wasting too much material.
Run a test filling cycle, and then lift the bag to weigh it with a separate, calibrated scale (don't trust the machine's internal scale alone-always cross-check). If the machine shows 500 pounds but the actual weight is 480 pounds, you'll need to adjust the calibration offset in the control panel. Repeat this test 2–3 times to ensure consistency; machine accuracy should be within ±0.5% of your target weight. If it's not, check for air leaks in the weight sensor connections or make sure the auger is moving smoothly without obstructions. For powder products, you may also need to adjust the "dribble feed" setting-this is the slow speed the auger uses in the final 10–15% of filling to avoid overshooting the target weight.
Step 4: Testing for Safety and Performance (Final Check Before Full Operation)
Once calibration is done, it's time to run a full system test with a real batch of product (start with a small batch, 10–15 bags, to catch any issues). As the operator runs through each cycle, watch for common problems: material spilling around the filling head, the bag shifting during lifting, dust being released into the air, or the machine making unusual noises. If you notice a spill, check that the bag's spout is properly sealed and the clamp is tight; if the bag shifts, adjust the bag lifter settings (most machines have adjustable height and tension for different bag sizes).
Safety is non-negotiable here. Make sure all guards around moving parts (like the auger or bag lift) are in place and secured-these guards are designed to prevent operators from getting caught in moving components. Also, confirm that the dust extraction system is working; if not, you risk creating a hazardous dust explosion risk, especially for fine powders like flour or plastic resin. Our technical support team always advises customers to test their dust collection system during installation, and we provide optional explosion-proof components for facilities handling flammable materials.
Don't forget to train your operators on the machine's controls during this testing phase. Even the best machine will underperform if the team using it doesn't know how to adjust settings, perform basic maintenance, or respond to error codes. We include a full operator manual with every machine, and we also offer free virtual training for our customers during installation to walk through these steps in real time.
Common Installation Mistakes to Avoid (From Years of On-Site Support)
Over the years, I've seen the same mistakes repeat across hundreds of installations, so it's worth calling them out to help you skip these headaches. First, never skip the level check after anchoring the machine-bolt torque can shift the frame slightly, and even a ¼-degree tilt can ruin filling accuracy. Second, don't use extension cords for electrical or air connections-they can cause voltage drops or air pressure loss that damage the machine or slow down cycles. Third, always test the machine with your actual product before full production; a machine that works for granules may need different calibration for powders, and using a test material (like sand or dummy grain) can lead to inaccurate settings once you start handling your real product.
Final Notes for Long-Term Success
Installing a big bag filling machine doesn't have to be overwhelming, especially when you plan ahead and work with a supplier that provides clear guidance. Once your machine is installed and running, don't forget to complete a maintenance checklist regularly-lubricate moving parts every 500 hours, inspect the weight sensors monthly, and clean the auger and hopper after each batch to prevent cross-contamination between different products.
If you're in the market for a new Big Bag Filling Machine, Bulk Bag Filling Machine, or specialized models like the Horizontal Single-Helix Feeding Bag Packaging Machine Per Ton or Ton Bag Packing Machine, our team is here to support you every step of the way, from pre-installation planning to post-setup troubleshooting. To discuss your specific facility needs and request a customized quote, reach out to our sales team today. We can also connect you with case studies from similar operations to show how our machines have improved their filling efficiency and reduced downtime.